Sunday 29 March 2015

Yokes Finished

Got the top and bottom yokes finished.
Drag bars fitted to the top yoke with alloy risers
and stops fitted to the bottom yoke.


Friday 27 March 2015

Modifying the Yoke Part 2

Measured up the top yoke for the new bars.
I have decided not to run the standard aprilia
bars instead to go with risers and drag/flat bars.
Again planning the holes to avoid the webs underneath.

Bought  set of cheap aluminium risers off e-bay
which come with odd-ball M7 bolts.


Modifying the Yoke

Started with the front end: the bars and stops.
I measured the bottom yoke for the stops.
Trying to locate them to avoid the webs
underneath and achieve a good angle.


Wednesday 25 March 2015

Side Stand Sorted

Modified side stand to relocate the original spring and
Shortened the kick tab, both the tab and the foot do not
interfere with the gear change lever.


Tuesday 24 March 2015

Left Pipe Extended

I took the plunge and cut the end can off the
left hand exhaust. This enabled me to mount
the main body of the exhaust to the engine/frame
to check the side stand clearance and spring
location.

The end can will have to be extended by a minimum
of 125mm to clear the swingarm. The image below
shows it extended fully by about 200mm. This also
places it wider than before.


Friday 20 March 2015

End Can Extender

Another option and probably a more suitable one
is to extend the end can past the point of contact with
the swingarm. Photoshop estimation below.


Thursday 19 March 2015

Exhaust Run Fine Tune

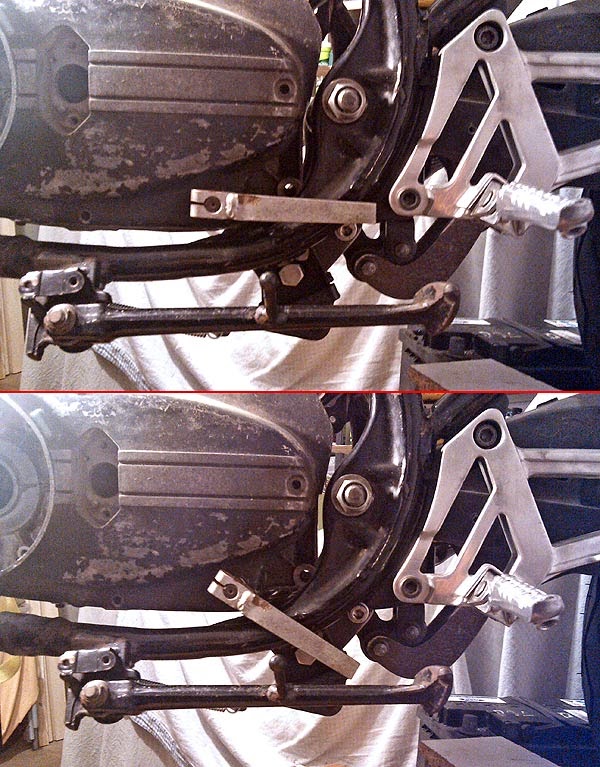
In order to get the side stand clearances sorted
the Exhaust run really has to be finalised.

I cut a length of pipe to simulate the header length
and offered it up to see how the exhaust on the left
sat. There are two issues,
[1.] the inside rib on the Micron exhaust clashes with
the cross bar of the frame but this can be ground
down to clear in that particular spot and welded to
re-seal if needed, this will also have to be done with
the right side too.
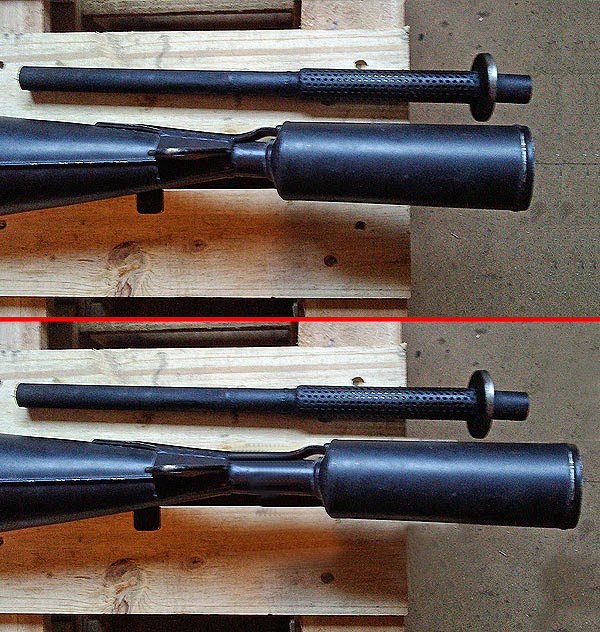
[2.] the end can as mentioned before clashes with the
swinger which is wider on the left for the chain run.
I am planning to slice a piece off the inside at a
straight angle and weld a flat piece back on. This will
only affect the padding inside and not the baffle itself.
it shouldn't be too much to remove, approximately
20mm in and about 50mm in length . . .


Friday 13 March 2015

Exhaust Run

temporarily fitted the pipes to check clearances
here is how it should look . . .

because the exhaust ports are angled inwwards
it looks like the cans  will clear the swingarm.


Gear Change

More side stand ponderings
there will have to be a few tweaks to the side stand.

 it turns out the point where the spring is held
on the stand hits the exhaust along with the spring.
I know I have the original spring in the garage
somewhere, i put it somewhere safe, as usual too safe.
this would be a better fit as the spring part of it does
not run the full length link the temporary one in the image.

the gearchange is ok but the kick peg on the side
will have to be moved.


Wednesday 11 March 2015

Freestanding

no need for belts or straps . . .
managed to fit a side stand last night. I had one
from a Honda CBR-600 "in stock" which just
bolts on after a slight modification to the outer
diameter of the mounting surface where a sensor
fits on the CBR stand.

I need to check that the gear linkage and footrest
clear the folded stand . . . looks a bit close . . .


Tuesday 10 March 2015

Rear Engine Mount

I decided to use the existing rear engine mounts
on the F2 frame but while the engine mount
lines up perfectly with the existing frame mount
on the left hand side the bolt holes do not line up.

A few 5mm thick steel mounts were fabricated and
welded with an aluminium spacer to fix the engine
to the frame. I just need to get a "Half Nut" and a
correct length bolt to finish the job.


Monday 2 March 2015

Sunday 1 March 2015

Engine Frame Clearance

In order for the engine to clear the frame in all areas
it had to be lifted at the rear by approximately 7mm.


Next up is to make some top rear mounts brackets using the existing
mounting points.


Engine Mounts final

Front engine mounts welded into place and primer
coated to combat the surface rust building up in my garage.

So engine in and lined up. I had concerns about the swingarm
angle and the relation between the final drive and the swingarm
pivot point. The engine has ended up a little lower than desired
this will have to be a compromise.

The swingarm angle is set approximately at 12.5 degrees which
I read somewhere that it was a desirable number.