Today I dropped the frame off at the welders to have the rear engine and shock mountings welded. Also there was a hairline crack on the front section of of the frame where one of the tension bars would mount for the native YPVS engine, this will be repaired. Images below show where I have started grinding away at the crack to get a flush weld.
Showing posts with label RD250. Show all posts
Wednesday, 27 May 2020
Tuesday, 7 April 2020
Rear Engine Brackets
This is something I have been looking to do since I finished all the
other engine mounts. The top rear bracket and spacer was too wide
so I cut the welded nuts off the existing mounting point and
placed the right side bracket on the left side of the mounting point,
also shortening the aluminium spacer.
Moving to the lower mounts which I was going to leave off, But I read
somewhere online that these engines want to twist while running so
I have had in mind to get these lower mounts sorted. I made the brackets
but need to have them welded to the frame.
other engine mounts. The top rear bracket and spacer was too wide
so I cut the welded nuts off the existing mounting point and
placed the right side bracket on the left side of the mounting point,
also shortening the aluminium spacer.
Moving to the lower mounts which I was going to leave off, But I read
somewhere online that these engines want to twist while running so
I have had in mind to get these lower mounts sorted. I made the brackets
but need to have them welded to the frame.
Labels:
Engine mounts,
F2 Frame,
RD250
Tuesday, 17 March 2020
Carb Clean
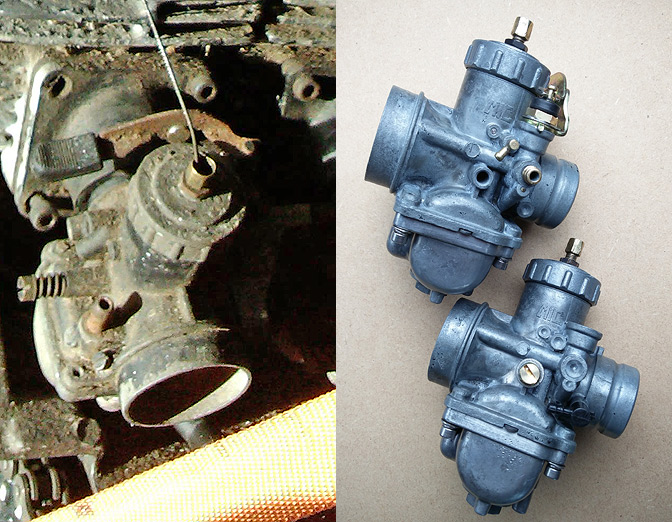
I invested recently in an ultrasonic cleaner and proper solution to clean the grubby carbs.
I had previously purchased new parts from Yambits to complete the rebuild, New jets,
needles, choke, seals and screws.
So after a good going over with a dremil and stainless steel brush I removed the old paint
and oxidisation and then gave them a good cleaning in the UC.
Next up I need to make a list of what parts I need to complete the job and what tasks I need
to do on the bike to finish.
I had previously purchased new parts from Yambits to complete the rebuild, New jets,
needles, choke, seals and screws.
So after a good going over with a dremil and stainless steel brush I removed the old paint
and oxidisation and then gave them a good cleaning in the UC.
Next up I need to make a list of what parts I need to complete the job and what tasks I need
to do on the bike to finish.
Labels:
2 Stroke,
350 F2 Frame,
Carburettor,
RD250,
Ultrasonic Clean,
Yamaha RD-250
Monday, 23 January 2017
Pistons
I managed to source 2 identical branded pistons
as a kit, with rings, Clips and Gudgeon Pins.
I couldnt find any info regarding the "Made in Taiwan"
Speed brand.
The tolerances work out pretty good and are as follows:
Cylinder oversize measurement: 0.035 - 0.040 = 0.035
Piston Ring end gap: 0.25 - 0.40 = 0.30
These are approximate measurements with feeler gauges.
as a kit, with rings, Clips and Gudgeon Pins.
I couldnt find any info regarding the "Made in Taiwan"
Speed brand.
The tolerances work out pretty good and are as follows:
Cylinder oversize measurement: 0.035 - 0.040 = 0.035
Piston Ring end gap: 0.25 - 0.40 = 0.30
These are approximate measurements with feeler gauges.
Friday, 1 May 2015
Switches
Over the last couple of weeks i have been working
mostly in the garden with a bit here and there in the
garage working on the front end of the project.
Both RD250 original handlebar switches have been
stripped cleaned, sprayed and assembled with stainless
screws/bolts and the wires re-covered with fresh heat shrink.
A bracket has been fabricated from 3mm aluminium bar
and fixed to the brake lever assembly.
I have also sprayed the clock backs and bracket along with
the headlight brackets, more on that to follow later.
mostly in the garden with a bit here and there in the
garage working on the front end of the project.
Both RD250 original handlebar switches have been
stripped cleaned, sprayed and assembled with stainless
screws/bolts and the wires re-covered with fresh heat shrink.
A bracket has been fabricated from 3mm aluminium bar
and fixed to the brake lever assembly.
I have also sprayed the clock backs and bracket along with
the headlight brackets, more on that to follow later.
Labels:
2 Stroke,
Front Brake Reservoir,
RD250,
Switches,
Yamaha RD-250
Friday, 13 March 2015
Exhaust Run
temporarily fitted the pipes to check clearances
here is how it should look . . .
because the exhaust ports are angled inwwards
it looks like the cans will clear the swingarm.
here is how it should look . . .
because the exhaust ports are angled inwwards
it looks like the cans will clear the swingarm.
Labels:
350 F2 Frame,
Codnor Micron,
Engine,
Exhaust,
RD250
Tuesday, 10 March 2015
Rear Engine Mount
I decided to use the existing rear engine mounts
on the F2 frame but while the engine mount
lines up perfectly with the existing frame mount
on the left hand side the bolt holes do not line up.
A few 5mm thick steel mounts were fabricated and
welded with an aluminium spacer to fix the engine
to the frame. I just need to get a "Half Nut" and a
correct length bolt to finish the job.
on the F2 frame but while the engine mount
lines up perfectly with the existing frame mount
on the left hand side the bolt holes do not line up.
A few 5mm thick steel mounts were fabricated and
welded with an aluminium spacer to fix the engine
to the frame. I just need to get a "Half Nut" and a
correct length bolt to finish the job.
Labels:
350 F2 Frame,
Engine mounts,
RD250
Tuesday, 24 February 2015
Engine Mounts
Next up is to get some new engine mounts welded
onto the frame. The earlier aircooled front engine
mounts are positioned the same as the later LC
ones but are the full width of the cases so the
existing mounts on the frame will have to be removed.
I plan to use 2 sets of mounts either side, an inner
and outer mount. The engine will bolt onto the inner
mount and that will in turn bolt to the outer mount
welded to the frame.
Mock up of the 3 engine mounting points to be used initially.
Mock up of Inner and outer mounts
onto the frame. The earlier aircooled front engine
mounts are positioned the same as the later LC
ones but are the full width of the cases so the
existing mounts on the frame will have to be removed.
I plan to use 2 sets of mounts either side, an inner
and outer mount. The engine will bolt onto the inner
mount and that will in turn bolt to the outer mount
welded to the frame.
Mock up of the 3 engine mounting points to be used initially.
Mock up of Inner and outer mounts
Labels:
350 F2 Frame,
Engine mounts,
RD250,
Yamaha RD-250
Thursday, 19 February 2015
Clean Crank Case
Attacked the crankcases with Engine Cleaner, Diesel
and a tooth brush then finished off with a brass wheel
attached to a drill on the outer surfaces followed by a
stainless steel brush on a dremil for the small spaces.
This is familiar work, had to do a lot of it on the aprilia re-build.
It turned out that there was very light oxidisation on the
outer surfaces of the cases thanks to the layer of dirt,
earth, compost, organic matter but i uncovered two nasty
little details that need attention...
The lower crankcase bolt hole at the final drive bearing
has suffered from the incorrect bolt being inserted at some
stage in a past life. The top case has a section missing
about 10mm wide. Hope to have them back from the aluminium
welders this evening, luckily this is the dry side of the engine.
Labels:
2 Stroke,
Crank Cases,
RD250
Tuesday, 17 February 2015
Split Cases
I have had this engine for about 4 years
and its finally stripped. I think the crank
needs re-building ! . . . and the cases really
need to be cleaned.
and its finally stripped. I think the crank
needs re-building ! . . . and the cases really
need to be cleaned.
Labels:
2 Stroke,
Crank Shaft,
Engine,
RD250,
Yamaha RD-250
Sunday, 15 April 2012
Detour
Lined up part of the next project - spotted a cheap Yamaha RD250 engine for sale online and bought it. Its a 1975 twin model and needs a lot of work as you can see from the pics below. It came with the original 28mm Mikuni carbs and 2 ignition coils which seem to have been butchered at some point.
I am thinking along two different directions for this project, [1] transplant the engine into a Yamaha FZR250/400 chassis and [2] cafe racer.
Labels:
RD250,
Yamaha,
Yamaha Carburetor's,
Yamaha Engine
Subscribe to:
Posts (Atom)